The Best Nano Banana Pro Prompt Formula for Photo Editing
Google's own prompting guidance draws a useful line between generation and editing: when a base image already exists, the prompt should focus on what changes and what stays the same. It also recommends being explicit about the content that must remain untouched.
Use this structure as your starting point:
Edit only [EDIT TARGET] in the uploaded photo.

Change [CURRENT STATE] to [REQUESTED RESULT].

Keep [PROTECTED DETAILS] consistent with the original image, including [IDENTITY, EXPRESSION, POSE, BODY PROPORTIONS, PRODUCT SHAPE, CAMERA ANGLE, COMPOSITION, OR BACKGROUND STRUCTURE].

Integrate the edit naturally by matching the original lighting direction, shadows, perspective, depth of field, color temperature, surface texture, and image grain.

Do not redesign or regenerate unrelated parts of the image.

Output: [ASPECT RATIO, RESOLUTION, AND INTENDED USE].
This formula contains five useful controls:
Edit target: The exact person, object, surface, or region to change.
Requested result: What the edited area should look like.
Protected details: The parts that should stay consistent with the upload.
Visual integration: The lighting, perspective, texture, and focus the new content must match.
Output requirement: The desired crop, aspect ratio, resolution, or use case.
Do not fill every prompt with every possible camera term. Use only the details that affect the edit. A short, precise instruction usually gives you a result that is easier to inspect than a paragraph containing five unrelated requests.
How to Use These Nano Banana Pro Photo Editing Prompts
Step 1: Upload the Clearest Version of the Photo
Use the largest original you have, especially when the edit touches a face, product label, patterned fabric, or fine hair. Repeatedly compressed screenshots give the model less visual information to preserve.
Step 2: Replace Every Bracketed Detail
Do not submit placeholders such as [location] or [background]. Write what is actually visible: “the tourist in the red jacket behind the woman” is more useful than “the person in the background.”
Step 3: Make One Major Edit First
Change the background before changing the outfit. Correct the lighting before retouching the skin. This makes it easier to identify which instruction caused a face, product, or composition to drift.
Step 4: Inspect the Protected Details
Zoom in and check the face, hands, hairline, text, logo, package geometry, reflective surfaces, repeated patterns, and straight architectural lines. Prompt-based editing generates a new result; it does not give you pixel-level locks.
Step 5: Correct Only the Error
Use follow-up prompts for small refinements instead of expecting the first output to be final. Keep the repair instruction short: preserve the successful edit and name only the detail that needs to be restored.
15 Best Nano Banana Pro Prompts for Photo Editing
1. Remove an Unwanted Person from a Travel Photo
Best for: Photobombers, passersby, tour groups, or a person blocking part of a landmark.
Recommended input: A travel photo in which the unwanted person is visually separate from the main subject. A smaller obstruction is easier to reconstruct than someone covering half the scene.
Remove only the person wearing [CLOTHING] at [EXACT LOCATION] from the uploaded travel photo. Also remove that person’s visible shadow, reflection, and any object directly connected to them.

Reconstruct the newly exposed [GROUND, WALL, BUILDING, WATER, OR LANDSCAPE] so it follows the surrounding pattern, perspective, texture, depth, and lighting.

Keep the main subject’s facial identity, expression, pose, body proportions, clothing, hair, and position unchanged. Preserve every other person, the landmark, camera angle, crop, colors, focus, weather, shadows, and overall composition. Do not alter unrelated areas.
Keep unchanged: The main subject, every intended person, landmark geometry, crop, and lighting.
Repair prompt:
Keep the person removed, but restore the main subject’s original face, expression, pose, clothing, and exact position. Make no other changes.
Check for: Repeated paving that bends, duplicated people, missing railings, or a changed face.
Before-and-after idea: Use a vacation portrait with one tourist standing behind the subject and partially covering a tiled plaza or building.
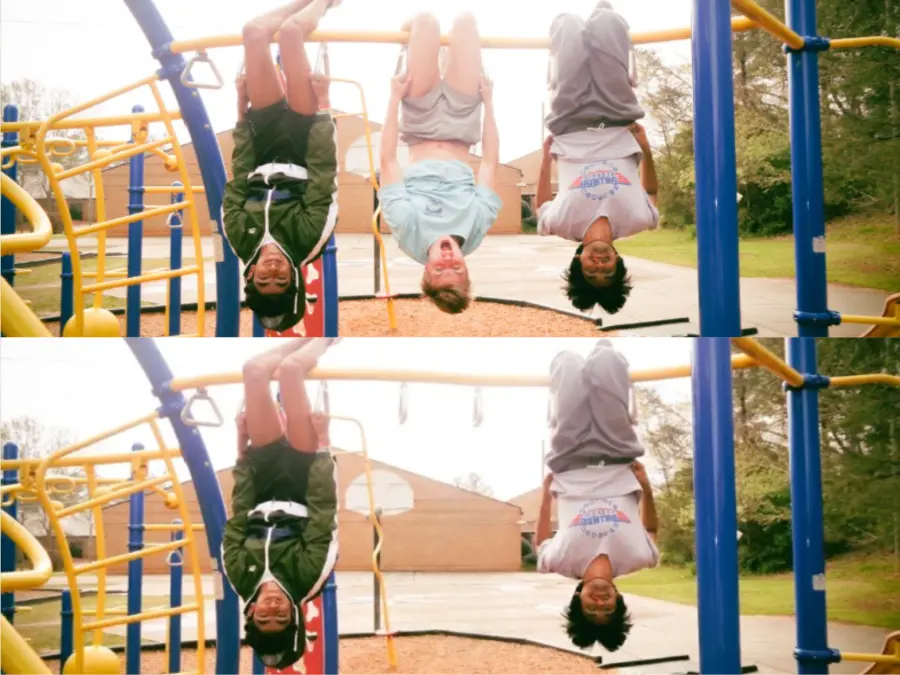
Want the quickest workflow for this edit? Upload the image to the GPT Proto AI Object Remover, describe the person and location, and review the reconstructed background before downloading.
2. Replace a Messy Background with a Clean Studio Backdrop
Best for: Profile photos, creator portraits, team pages, and simple product images.
Recommended input: A well-lit subject with visible edges and limited motion blur.
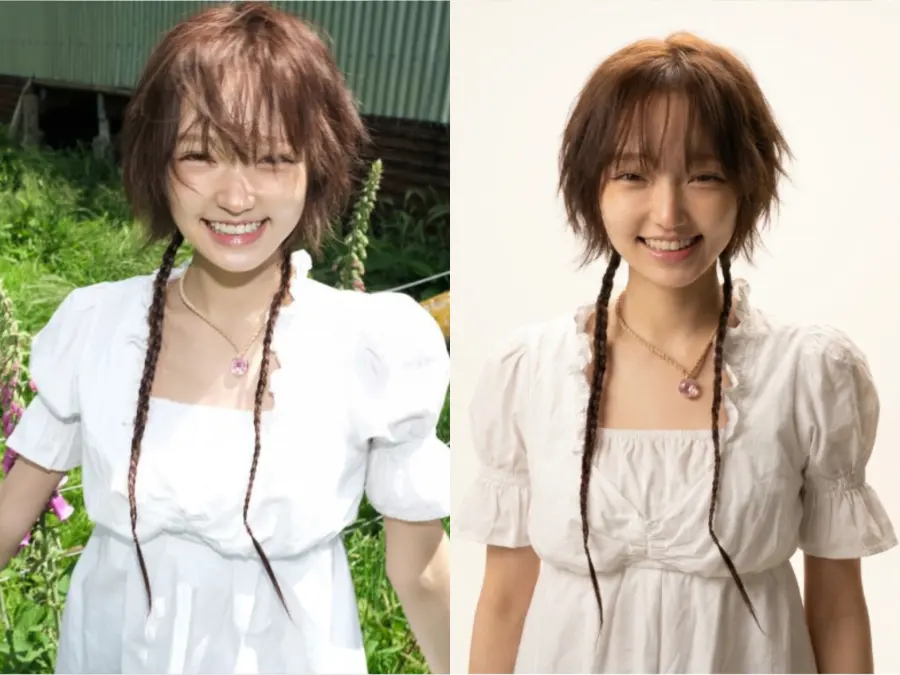
Replace only the current background with a clean [WARM WHITE, LIGHT GRAY, OR BEIGE] studio backdrop with a subtle natural gradient.

Keep the subject’s facial identity, facial structure, apparent age, expression, hairstyle, individual hair strands, pose, body proportions, clothing, accessories, and position unchanged. Preserve the original camera angle, lens perspective, crop, and depth of field.

Create realistic edge separation around the hair and clothing. Add only the soft contact shadow and reflected light needed to place the subject naturally in the new studio environment. Do not retouch the face or redesign the outfit.
Keep unchanged: Face, hair, outfit, pose, camera angle, and crop.
Repair prompt:
Keep the new studio background. Restore the original hair outline, facial structure, clothing details, and crop exactly as shown in the source photo.
Check for: Haloed hair, cut-off earrings, floating shoulders, or over-smoothed skin.
Before-and-after idea: Use a waist-up portrait taken in a cluttered bedroom and replace only the room with a warm-white backdrop.
3. Turn a Casual Selfie into a Professional Headshot
Best for: LinkedIn, a portfolio, an author bio, or an internal company profile.
Recommended input: A front-facing or three-quarter selfie without a heavy beauty filter.
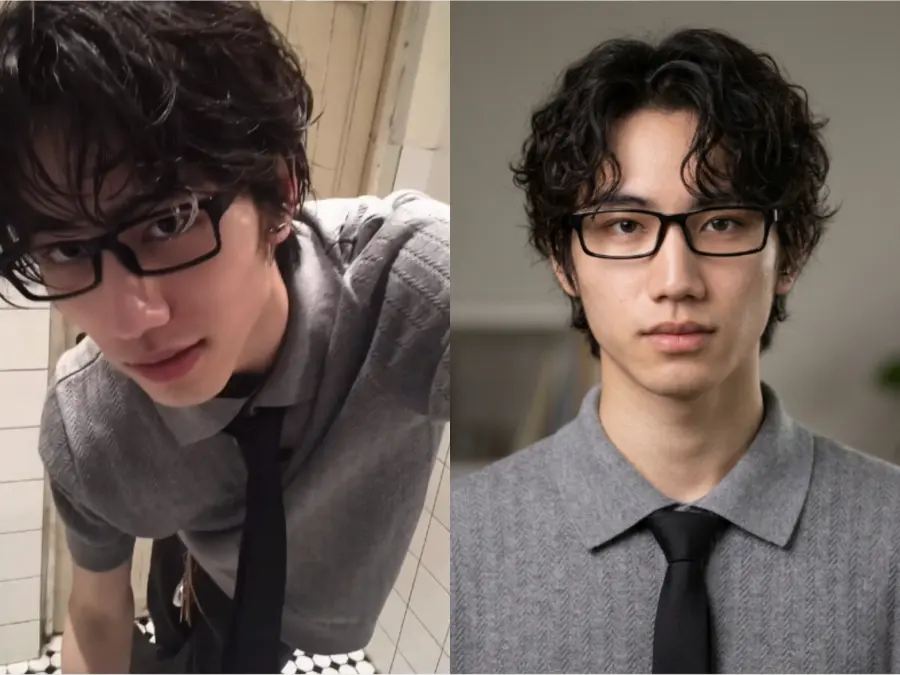
Edit the uploaded selfie into a realistic professional headshot. Replace the background with a softly blurred neutral office or warm-gray studio setting. Correct the lighting to soft, balanced portrait light with natural catchlights and controlled shadows.

Keep the subject’s identity, facial anatomy, skin tone, apparent age, eye shape and color, nose, lips, expression, hairstyle, and body proportions consistent with the original. Keep the existing clothing unless a clothing change is explicitly requested. Preserve a natural camera look and realistic skin texture.

Reframe to a centered chest-up composition suitable for a professional profile. Do not make the subject look younger, slimmer, heavily retouched, or like a different person.
Keep unchanged: Identity, age, key facial features, expression, and natural skin texture.
Repair prompt:
Keep the professional background and lighting, but restore the subject’s original facial proportions, apparent age, skin texture, eye shape, and expression.
Check for: A narrower jaw, enlarged eyes, altered teeth, synthetic skin, or an identity shift.
Before-and-after idea: Start with an ordinary phone selfie in a café or bedroom; edit it into a restrained headshot rather than a glamorous fashion portrait.
4. Correct Poor Lighting and an Unnatural Color Cast
Best for: Yellow indoor light, a blue outdoor cast, underexposed faces, or harsh overhead shadows.
Recommended input: A photo that still contains recoverable detail in the face and background.
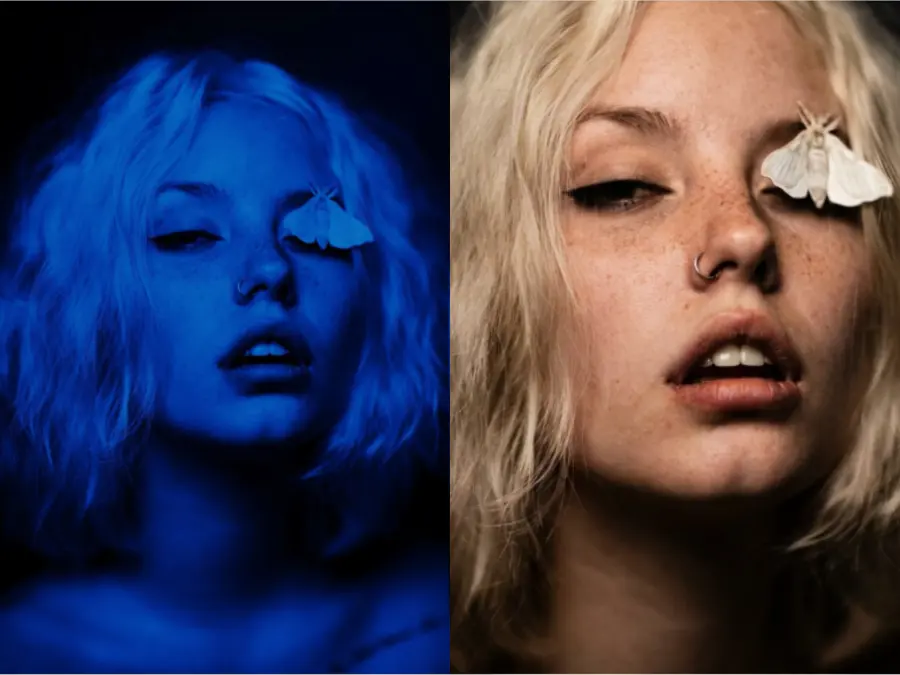
Correct only the exposure, white balance, and color cast in the uploaded photo. Neutralize the [YELLOW, GREEN, OR BLUE] tint, gently lift shadow detail on [SUBJECT OR AREA], and reduce harsh highlights without flattening the image.

Keep the subject’s identity, facial structure, expression, skin texture, hairstyle, pose, clothing, and body proportions unchanged. Preserve the background, objects, camera angle, composition, depth of field, and time-of-day cues.

Use natural skin tones and believable tonal contrast. Match the direction of the existing light; do not add a new light source, beauty filter, dramatic relighting, or unrelated color grade.
Keep unchanged: All scene content, face, pose, background, and light direction.
Repair prompt:
Keep the corrected exposure, but restore the original facial features and background colors. Reduce the correction until the skin tone and room still look natural.
Check for: Gray skin, clipped highlights, an invented window reflection, or a background that changes color unnecessarily.
Before-and-after idea: Use an indoor portrait with a strong yellow cast and an underexposed face.
5. Retouch Skin Without Creating Plastic Texture
Best for: Close-up portraits, beauty images, profile photos, and editorial crops.
Recommended input: A sharp portrait with visible natural skin detail.
Apply restrained, natural portrait retouching only to the subject’s skin. Reduce temporary blemishes, minor redness, and a small amount of under-eye darkness while keeping pores, fine lines, freckles, moles, and natural tonal variation visible.

Keep the subject’s identity, facial structure, apparent age, expression, eye shape, nose, lips, jawline, skin tone, hairstyle, makeup, and lighting unchanged. Do not reshape the face or body. Do not whiten the skin, enlarge the eyes, sharpen every pore, add glossy makeup, or create waxy texture.

The result should look like the same person photographed under the same conditions after subtle professional retouching.
Keep unchanged: Facial anatomy, age, expression, freckles or permanent marks, and lighting.
Repair prompt:
Restore more of the original pores, fine lines, freckles, and natural skin variation. Keep only the reduction of temporary blemishes and redness.
Check for: Waxy cheeks, erased freckles, altered eyelids, a thinner nose, or mismatched neck texture.
Before-and-after idea: Choose a clean close-up portrait with minor redness or temporary blemishes, not a severely blurred or compressed selfie.
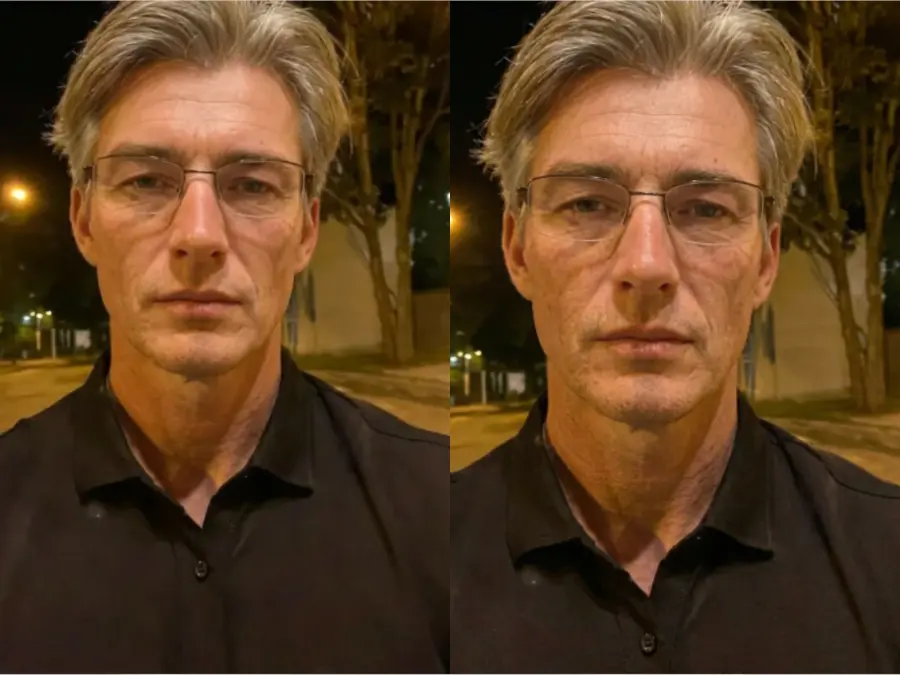
6. Change Clothing Color Without Changing the Outfit
Best for: Testing colorways, coordinating a feed, or adapting a product or portrait photo to a palette.
Recommended input: Clothing with a clear outline and visible folds.
Change only the color of the subject’s [GARMENT] from [CURRENT COLOR] to [NEW COLOR].

Keep the garment’s exact cut, fit, neckline, sleeve length, stitching, fabric texture, folds, buttons, pockets, printed details, and logo unchanged. Preserve the person’s identity, face, hair, skin tone, pose, hands, body proportions, accessories, background, camera angle, crop, lighting, and shadows.

Apply the new color consistently across highlights, midtones, shadows, reflections, and partially occluded areas so the fabric remains realistic. Do not replace the garment or change any other color in the image.
Keep unchanged: Garment construction and texture, person, accessories, background, and all other colors.
Repair prompt:
Keep the new garment color, but restore the original fabric texture, stitching, folds, buttons, logo, and exact garment shape.
Check for: A changed neckline, lost print, recolored skin, or a bag and background that also shift hue.
Before-and-after idea: Use a portrait with a red blouse and change it to navy while keeping every seam and accessory intact.
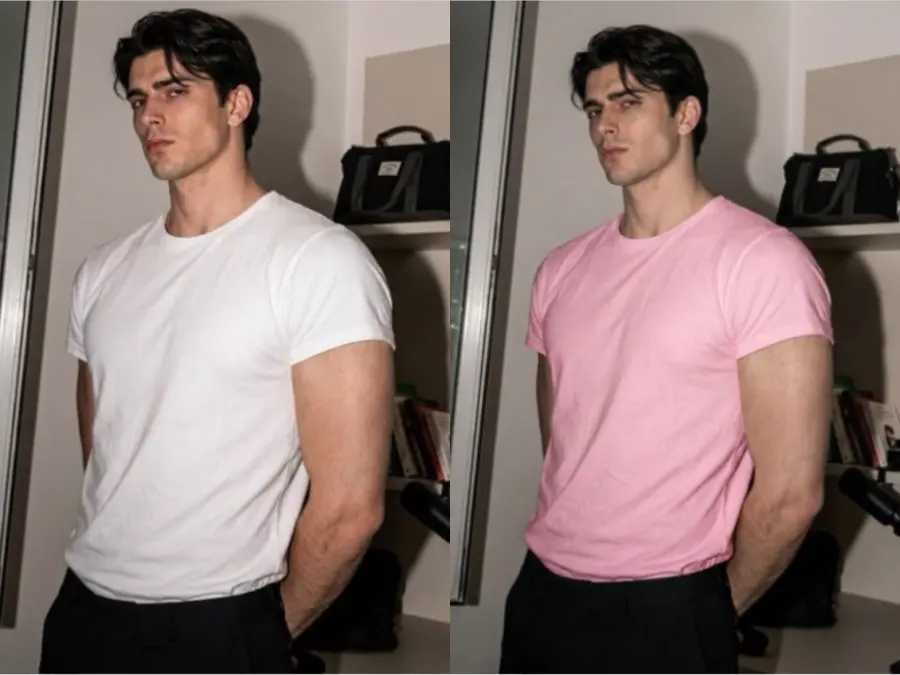
7. Replace an Outfit Using a Second Reference Image
Best for: Wardrobe concepts, editorial mockups, and campaign previsualization.
Recommended input: Image A should clearly show the person and pose; Image B should clearly show the outfit from a compatible angle.
Use Image A as the base photo and keep its person, face, hairstyle, pose, body proportions, camera angle, background, lighting, and composition.

Use Image B only as the clothing reference. Replace the outfit in Image A with the [SPECIFIC GARMENT OR COMPLETE OUTFIT] from Image B, including its silhouette, color, fabric, neckline, sleeves, visible construction, and accessories that belong to the outfit.

Fit the referenced clothing naturally to the pose in Image A. Preserve realistic fabric tension, folds, occlusion, contact shadows, and scale. Do not copy the model, face, body, pose, background, lighting, or camera angle from Image B. Do not change the person’s identity or anatomy.
Keep unchanged: Everything from Image A except the clothing; copy only the specified outfit from Image B.
Repair prompt:
Keep the referenced outfit, but restore the original person, face, hairstyle, body proportions, pose, hands, background, and framing from Image A.
Check for: Features copied from the reference model, altered anatomy, fused hands, or an outfit that ignores the original pose.
Treat this result as a visual concept, not a promise of real-world fit. An AI outfit edit cannot accurately verify sizing, drape, material behavior, or comfort.
Before-and-after idea: Pair a simple standing portrait with a separate photo of a tailored black suit or evening dress.
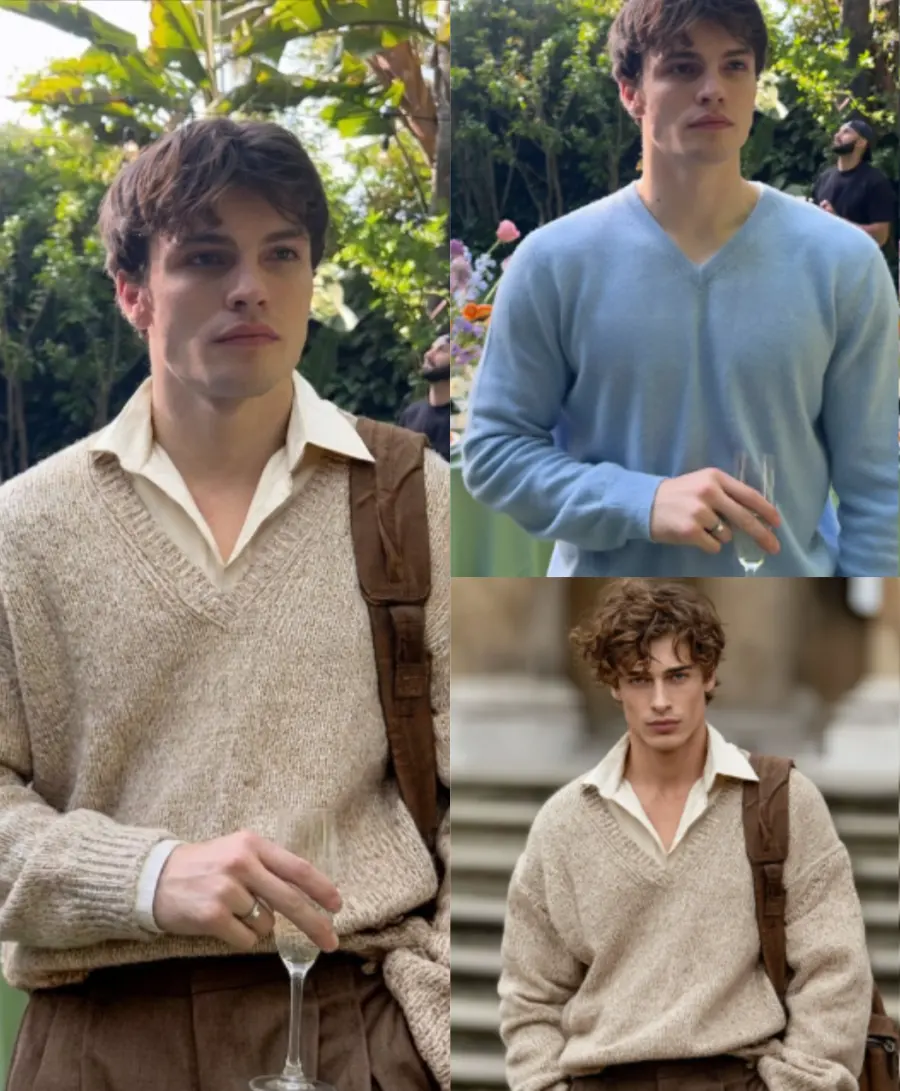
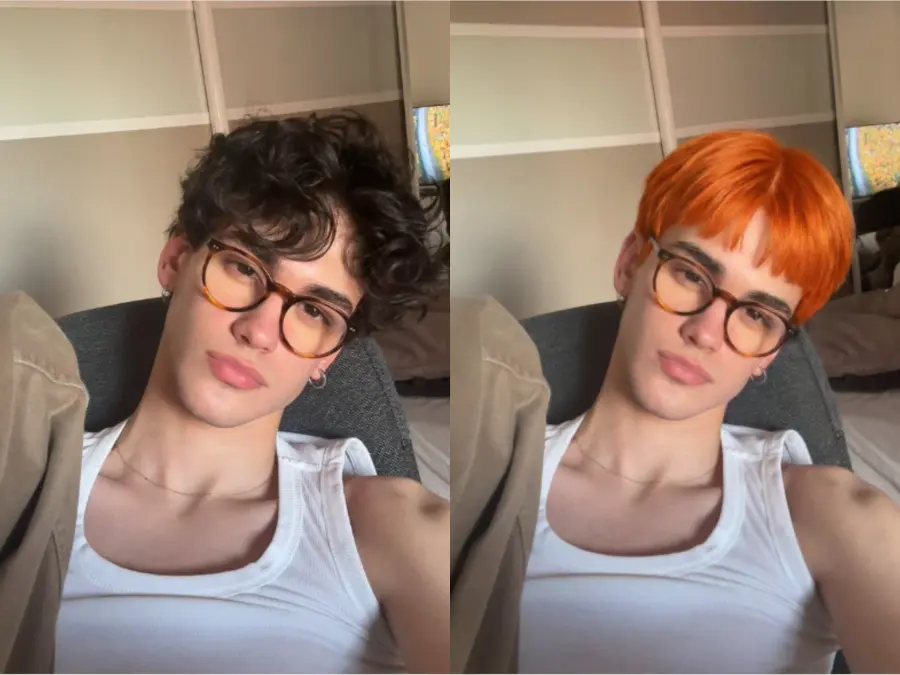
8. Change the Hairstyle While Keeping the Same Face
Best for: Haircut previews, editorial variations, or character continuity studies.
Recommended input: A clear portrait with the current hairline and both sides of the face visible.
Change only the subject’s hairstyle from [CURRENT HAIRSTYLE] to [NEW HAIRSTYLE]. Specify the new length as [LENGTH], the texture as [STRAIGHT, WAVY, CURLY, OR COILY], the part as [CENTER OR SIDE], and the fringe as [DESCRIPTION]. Keep the hair color [COLOR].

Keep the subject’s facial identity, facial structure, apparent age, expression, eyebrows, eyes, nose, lips, jawline, ears, skin tone, pose, clothing, body proportions, background, camera angle, and crop unchanged.

Create realistic individual strands, density, volume, contact shadows, and edge detail that match the original light and depth of field. Do not reshape the face or add beauty retouching.
Keep unchanged: Face, hair color unless requested, expression, pose, and composition.
Repair prompt:
Keep the new hairstyle, but restore the original face, hairline position, ear shape, expression, skin texture, and head proportions.
Check for: A smaller face, moved hairline, changed eye shape, hidden earrings, or inconsistent hair shadows.
Before-and-after idea: Change long straight hair to a shoulder-length textured bob on a clean, evenly lit portrait.
9. Remove Glare from Glasses Without Altering the Eyes
Best for: Headshots, event photos, and portraits shot under strong lights.
Recommended input: The eyes should remain at least partly visible through the glare; a fully opaque reflection gives the model less reliable information.
Remove only the bright glare and distracting reflections from both eyeglass lenses. Reconstruct a clear, natural view through the lenses using the visible facial context.

Keep the subject’s eye shape, iris color, pupil size, gaze direction, eyelids, eyebrows, expression, facial structure, skin texture, and identity unchanged. Preserve the eyeglass frame’s exact shape, color, thickness, hinges, position, lens curvature, and subtle realistic lens transparency.

Keep the original lighting, catchlights, pose, hairstyle, clothing, background, camera angle, crop, and depth of field. Do not enlarge, brighten, sharpen, or symmetrize the eyes.
Keep unchanged: Eyes, gaze, frames, face, lighting, and expression.
Repair prompt:
Keep the glare removed, but restore the original eye shape, iris color, gaze direction, eyelids, frame geometry, and facial expression.
Check for: Mismatched pupils, invented eye detail, bent frames, or the total removal of natural lens reflections.
Before-and-after idea: Use a professional portrait with a white rectangular reflection across both lenses but partly visible eyes.
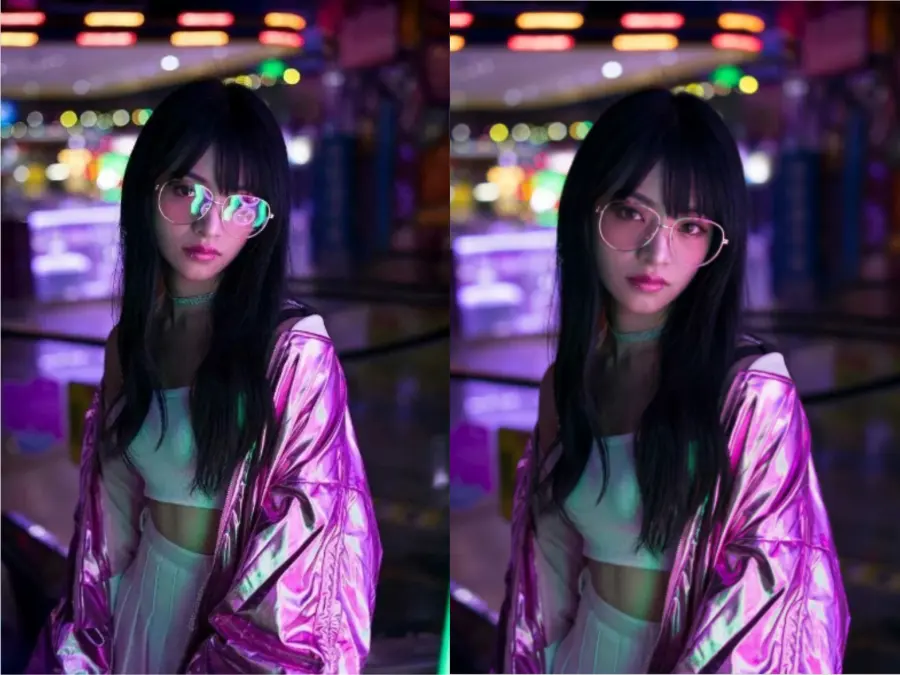
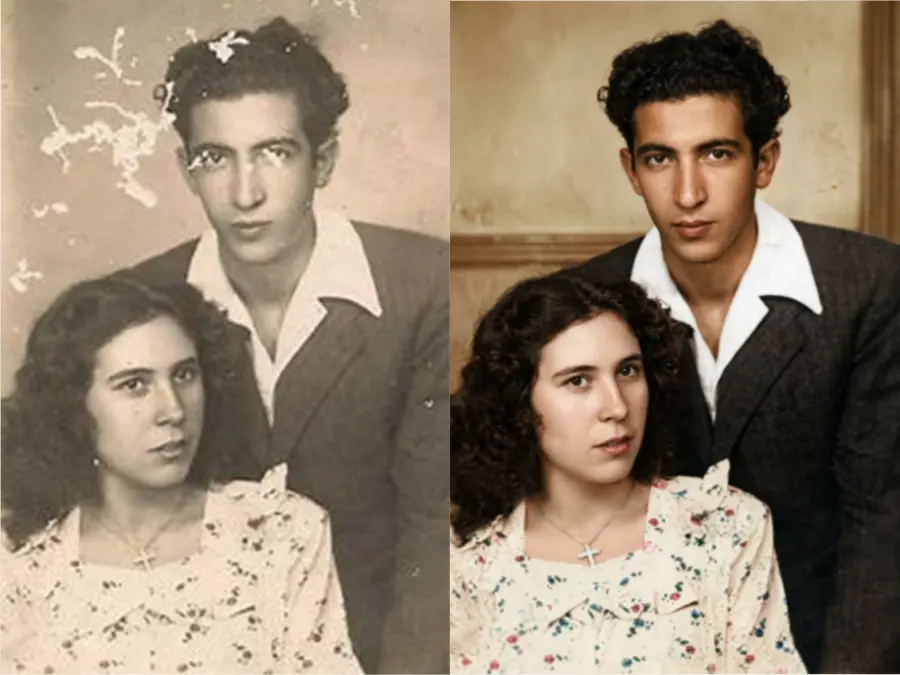
10. Restore and Colorize an Old Damaged Photograph
Best for: Faded family photos with scratches, dust, creases, small tears, or moderate missing areas.
Recommended input: A high-resolution scan rather than a phone photo of the print under glass.
Restore the uploaded historical photograph while preserving the people, period, and original composition. Remove dust, scratches, crease lines, stains, and small tears. Reconstruct only genuinely missing areas by following nearby facial, fabric, hair, and background evidence.

Add restrained, historically plausible color to skin, hair, clothing, objects, and the setting. Keep each person’s facial identity, apparent age, expression, pose, body proportions, clothing design, hairstyle, and position unchanged. Preserve the original camera angle, framing, period details, and photographic character.

Retain subtle film grain and natural tonal softness. Do not modernize the faces, clothing, makeup, architecture, or color palette. Do not turn the photo into a glossy contemporary portrait.
Keep unchanged: Identity, age, period details, composition, and historical photographic character.
Repair prompt:
Reduce the modern AI-photo appearance. Restore the original facial proportions, age, clothing details, soft film grain, and period-appropriate muted color.
Check for: Younger faces, modern makeup, invented jewelry, excessive sharpness, or saturated color.
Before-and-after idea: Use a scratched black-and-white family portrait with intact faces and period clothing.
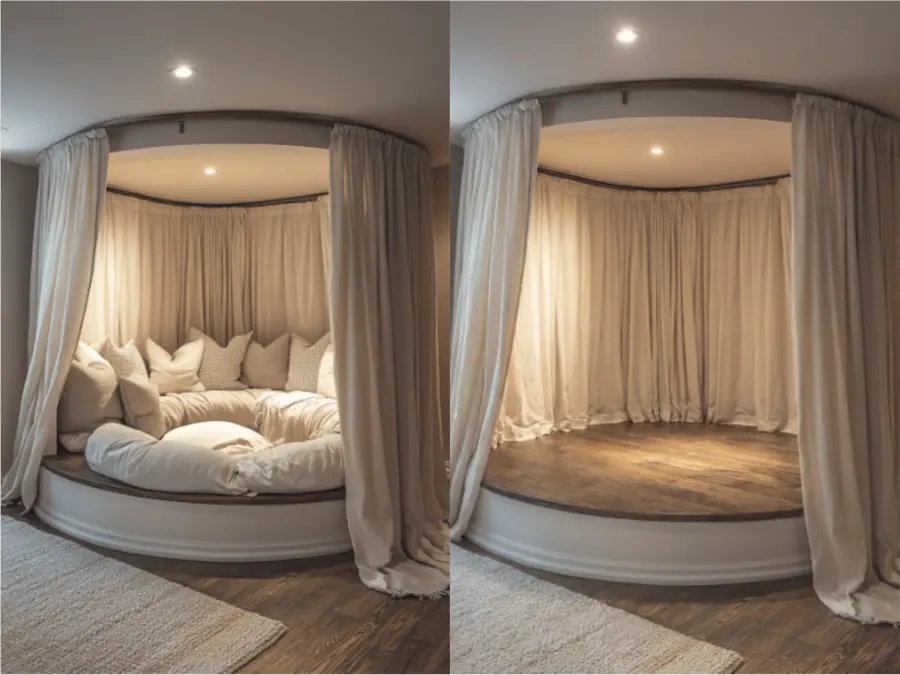
11. Remove Clutter from an Interior Photo
Best for: Real-estate previews, rental listings, room planning, and cleaner personal photos.
Recommended input: A room with identifiable clutter but visible wall, floor, and furniture boundaries.
Remove only the following clutter from the room: [LIST THE BOXES, CABLES, CLOTHES, PAPERS, TOYS, OR SMALL ITEMS] at [LOCATIONS]. Remove their attached cables, cast shadows, and reflections where applicable.

Reconstruct the exposed wall, floor, rug, tabletop, or furniture surfaces using the surrounding materials, seams, patterns, perspective, and lighting.

Keep the room’s architecture and layout unchanged, including walls, ceiling, floor, doors, windows, stairs, built-in fixtures, furniture, camera position, lens perspective, crop, lighting, and intended decor. Do not add new furniture, widen the room, straighten the camera, or redesign the space.
Keep unchanged: Architecture, furniture, room proportions, perspective, and lighting.
Repair prompt:
Keep the listed clutter removed, but restore the original furniture, wall and floor lines, room proportions, camera perspective, and lighting.
Check for: Warped floorboards, disappearing furniture legs, enlarged rooms, or softened window frames.
Before-and-after idea: Use a living room containing cardboard boxes, loose cables, and papers while the main furniture remains visible.
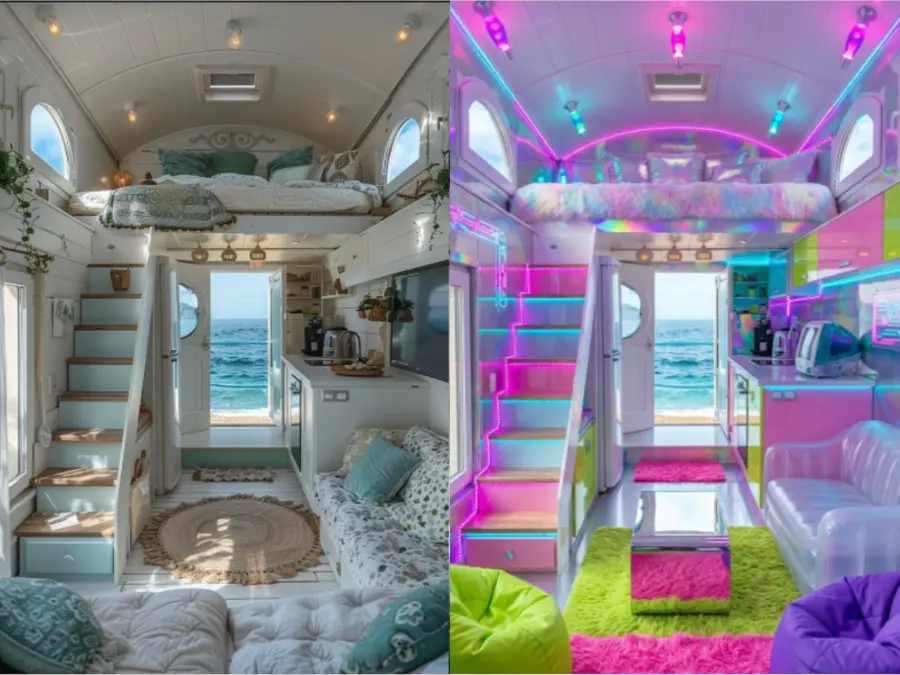
12. Redesign a Room While Preserving Its Architecture
Best for: Interior concepts, renovation mood boards, and furniture or palette exploration.
Recommended input: A wide, well-lit room photo with clear door, window, wall, and floor boundaries.
Redesign only the movable furnishings, surface finishes, textiles, and color palette of the uploaded room in a [WARM MODERN, JAPANDI, MID-CENTURY, OR OTHER] interior style.

Replace [ITEMS TO CHANGE] with [DESIRED FURNITURE, MATERIALS, AND COLORS]. Use realistic scale, spacing, contact shadows, material texture, and perspective.

Keep the architecture exactly consistent with the original: do not move, resize, add, or remove walls, doors, windows, columns, stairs, ceiling lines, built-in fixtures, or structural openings. Preserve the room dimensions, camera position, focal length, horizon, crop, and natural light direction. Do not make the room appear larger than it is.
Keep unchanged: Doors, windows, walls, stairs, built-ins, room size, and camera position.
Repair prompt:
Keep the new furniture and style, but restore every original wall, door, window, ceiling line, built-in feature, room proportion, and camera perspective.
Check for: Added windows, widened rooms, impossible furniture scale, floating rugs, or a moved doorway.
Before-and-after idea: Use an older living room and change the furniture and palette to warm wood and cream without altering the shell.
For edits like background replacement, relighting, portrait refinement, or room restyling, the GPT Proto AI Image Editor lets you upload the source, describe the result, generate, inspect, and download without setting up layers or masks.
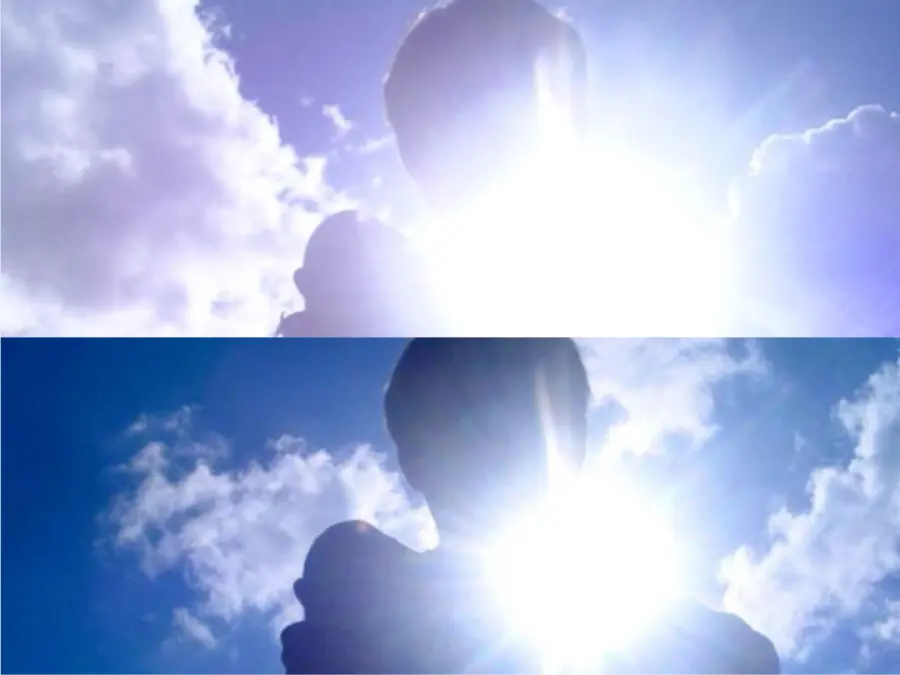
13. Replace an Overexposed Sky and Match the Scene Lighting
Best for: Landscapes, property photos, travel shots, and outdoor product images.
Recommended input: An image with a clear horizon or roofline and enough foreground information to infer the time of day.
Replace only the overexposed sky with a realistic [SOFT CLOUDY SKY, BLUE AFTERNOON SKY, OR SUBTLE SUNSET] appropriate to the existing scene and time of day.

Preserve the exact horizon, buildings, trees, mountains, subject, foreground objects, camera angle, crop, and perspective. Keep fine branches, roof edges, hair, and other silhouettes clean and unchanged.

Match the new sky to the scene’s existing light direction, shadow angle, color temperature, haze, reflections, and exposure. Adjust only the minimal foreground color spill and reflections needed for consistency. Do not turn daytime into sunset unless requested, add dramatic storm clouds, move the sun, or relight the entire image.
Keep unchanged: Foreground content, horizon, silhouette edges, scene geometry, and intended time of day.
Repair prompt:
Keep the new sky, but restore the original foreground exposure, building and tree edges, shadows, reflections, horizon, and color balance.
Check for: Glowing rooflines, broken branches, mismatched shadows, or a foreground that becomes orange after adding a mild sky.
Before-and-after idea: Choose an outdoor property or travel photo with a white sky but readable foreground detail.
14. Clean Up a Product Photo for an Ecommerce Listing
Best for: Product listings, catalog images, marketplaces, and campaign mockups.
Recommended input: A sharp product photo in which the package shape and label are readable.
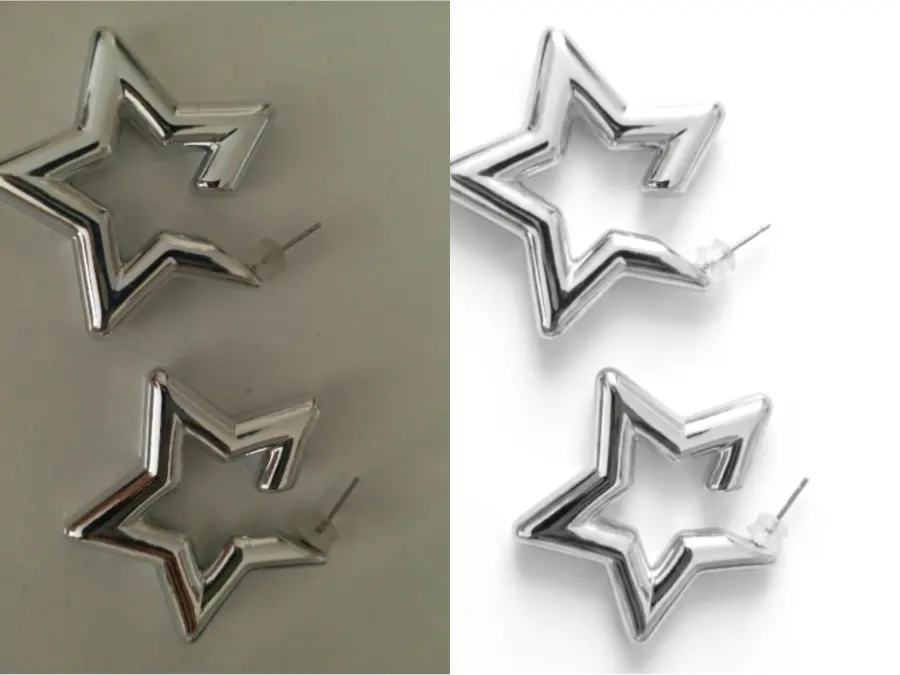
Clean up the uploaded product photo for an ecommerce listing. Remove only [DUST, SMALL SCRATCHES, UNWANTED PROP, CABLE, BACKGROUND CLUTTER, OR DISTRACTING REFLECTION]. Replace the current surface and background with [PURE WHITE OR LIGHT NEUTRAL STUDIO SETTING] if requested.

Keep the product’s exact geometry, dimensions, packaging proportions, cap or closure, material, color, logo placement, label layout, visible text, graphics, and distinguishing details unchanged. Preserve a realistic contact shadow and the original camera perspective.

Use clean, soft studio lighting with controlled highlights that describe the material accurately. Do not rewrite label text, invent claims, alter the logo, change the package shape, add accessories, or make the product appear larger.
Keep unchanged: Package geometry, logo, label layout and text, colors, materials, and camera perspective.
Repair prompt:
Keep the clean studio setting, but restore the original product shape, proportions, cap, colors, logo, label layout, and every readable character from the source image.
Check for: Misspelled label text, a warped bottle, a redesigned cap, floating shadows, or false package claims. Packaging text and small design details should always be checked at full size.
Before-and-after idea: Use a handheld or tabletop package photo with a distracting cable and uneven background, then turn it into a restrained white-background listing image.
15. Expand and Reframe a Photo for Social Media
Best for: Converting one image to 1:1, 4:5, 9:16, or 16:9 without cropping out the subject.
Recommended input: A photo with a clear subject and a background that can plausibly continue beyond the current frame.
Expand the canvas of the uploaded photo to [TARGET ASPECT RATIO] for [INSTAGRAM FEED, STORY, SHORT-FORM VIDEO COVER, BANNER, OR OTHER USE].

Keep the existing image content and the main subject locked in the current position and at the current size. Preserve the subject’s identity, facial features, expression, pose, body proportions, clothing, hair, and all original objects. Do not crop, stretch, rotate, shrink, or recenter the subject.

Generate only the new area beyond the original frame. Continue the background with matching perspective, horizon, architecture, texture, lighting, shadows, depth of field, color, and image grain. Leave [SPECIFY EMPTY AREA] as clean visual space for later text if needed. Do not add new people or distracting objects.
Keep unchanged: Every original image region as closely as possible, especially subject position, scale, identity, and pose.
Repair prompt:
Keep the expanded background, but return the original subject to the exact source position, size, pose, facial identity, clothing, and crop relationship. Do not modify the original central image area.
Check for: A smaller subject, duplicated limbs, repeated background objects, broken architecture, or invented people near the edges.
Nano Banana Pro supports multiple aspect ratios and 1K, 2K, and 4K output. Availability can vary depending on the interface or API surface you use.
Before-and-after idea: Start with a tightly cropped vertical portrait and expand it to 4:5 or 9:16 while keeping the person locked in place.
How to Write Better Nano Banana Pro Prompts for Photo Editing
Name the Exact Edit Target
“Make this photo better” gives the model permission to reinterpret nearly everything. Point to the actual target and, when needed, its location.
Avoid:
Clean this up.
Write:
Remove the two cardboard boxes on the floor to the left of the sofa and reconstruct the visible wood floor.
Say What Should Remain Unchanged
The protection clause should match the risk. A portrait needs identity protection. A product image needs geometry, color, logo, and label protection. An interior needs architectural protection.
Keep the subject’s facial identity, expression, pose, hairstyle, clothing, camera angle, crop, and background unchanged.
This does not guarantee a pixel-identical result, but it gives the model a clearer hierarchy.
Describe How the Edit Belongs in the Scene
A replacement can be correct in subject matter and still look pasted in. Name the visual relationships that matter: light direction, shadow softness, scale, perspective, depth of field, reflections, texture, and image grain.
For a small matte object, you may only need scale, perspective, and a contact shadow. For glass, polished metal, or a wet street, reflections matter too.
Give Each Reference Image One Job
When you upload more than one image, label them in the prompt:
Use Image A as the base photo and composition.
Use Image B only as the outfit reference.
Do not copy the person, pose, background, or lighting from Image B.
More inputs are not automatically better. Each one introduces another source the model may mix into the result.
Use a Repair Prompt Instead of Starting Over
If the new background is right but the face has drifted, keep the background and repair the face. If the outfit is right but the hands are wrong, name only the hands. Repeating the full original prompt can cause a wider regeneration and lose a part that already worked.
Common Nano Banana Pro Photo Editing Prompt Mistakes
Asking the Model to Enhance Everything
Words such as “enhance,” “improve,” or “make professional” are underspecified on their own. Translate the goal into observable edits: correct the yellow cast, replace the background, reduce two temporary blemishes, or remove the cable.
Combining Too Many Edits at Once
A request to change the background, outfit, hairstyle, expression, lighting, and aspect ratio gives you too many failure points to diagnose. Work in passes and keep the strongest result from each stage.
Forgetting to Protect Identity
“Same person” is useful, but not enough for a sensitive portrait. Name facial structure, apparent age, expression, eye shape, nose, lips, jawline, skin texture, and any permanent marks that matter.
Giving Contradictory Lighting Instructions
“Keep the lighting unchanged” conflicts with “turn noon into golden hour.” Decide which instruction wins. If you change the time of day, explicitly allow matching changes to shadows and reflections while protecting the scene geometry.
Treating an Outfit Edit as Accurate Virtual Try-On
An outfit-reference edit can help visualize a look. It cannot verify size, drape, mobility, material behavior, or real-world fit. Use it for concepts, then use actual measurements and product photography for a purchase or manufacturing decision.
Where Can You Get Free Nano Banana Pro Prompt Samples?
For a larger set of free prompts that you can browse and copy, use the Nano Banana Pro Prompt Gallery. That page is better when you want inspiration across many visual categories rather than a guided photo-editing workflow.
The 20 Best Nano Banana Pro Prompts for 2026 covers broader generation tasks such as product visuals, advertising, portraits, and graphic compositions.
If you are deciding whether a separate prompt-discovery site is useful, read the Banana Prompts XYZ review. You can also use the free Banana Prompts XYZ alternative when you want prompts that are easier to remix.
Which GPT Proto Tool Should You Use?
| What you want to do |
Best route |
Why |
| Remove a person, cable, sign, prop, text, reflection, or clutter |
AI Object Remover |
The workflow is already narrowed to identifying an unwanted element and rebuilding the cleared area. |
| Replace a background, relight a portrait, change colors, restyle a room, or clean up a product photo |
AI Image Editor |
Upload, describe the change, generate, inspect, and download without manual layers or masks. |
| Use multiple references, write detailed preservation rules, or continue with repair prompts |
Nano Banana Pro |
Better suited to readers who want direct control over the model and prompt workflow. |
| Browse more ideas before editing |
Nano Banana Pro Prompt Gallery |
Provides a wider collection of copyable prompt examples. |
The shorter workflow is not always the safer one. If the photo contains a recognizable face, exact packaging, small text, or important architectural lines, inspect the result closely no matter which route you choose.
Try These Photo Editing Prompts with Nano Banana Pro
Upload the original photo, paste the closest prompt above, replace the bracketed details, and make the first major edit before adding another instruction.
Use Nano Banana Pro on GPT Proto when you want direct prompt and reference-image control.
If you do not want to build a detailed workflow, start with the AI Image Editor. If the job is simply to remove something distracting, go directly to the AI Object Remover.