The Core Philosophy Behind Professional video editing tips
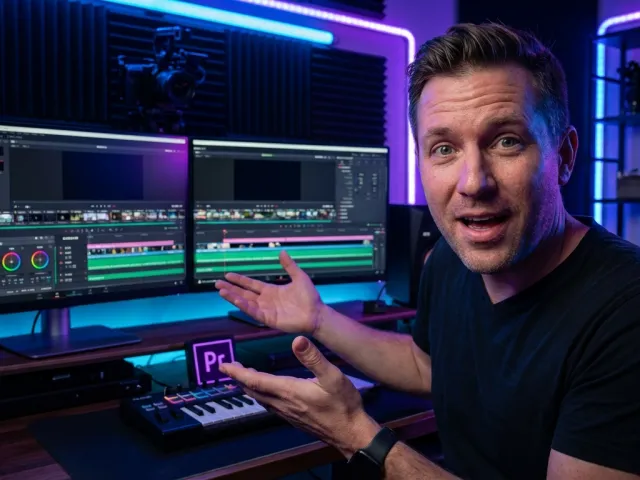
Most people think that getting better at editing involves buying a faster computer or a more expensive suite of tools. Here is the thing: it doesn't. I spend a lot of time talking to readers and browsing forums, and the same questions keep popping up. Whether you are working on a high-end commercial or a quick social media clip, the fundamentals remain identical. Great editing is invisible. It is about flow, psychology, and respect for the viewer's attention.
You might be using the most advanced AI-driven software or a basic free editor. Honestly, it is pretty much irrelevant. Most software packages offer nearly identical features these days. What matters is how you use the tools to tell a story. If your edits are jarring, no amount of 4K resolution or fancy plugins will save the project. You need to focus on the bridge between shots, which is where most video editing tips usually begin.
I have found that the most common friction point for beginners is the transition. We often rely on presets because they are easy, but presets are just averages. They are based on harvested user data from software makers, not necessarily what is best for your specific scene. To really elevate your game, you have to look past the default settings and understand the mechanics of why a cut works or why it fails.
But before we get into the weeds of frame counts and X/Y positioning, let's look at the actual techniques that separate the amateurs from the pros. These aren't just suggestions; they are the baseline for any serious editing workflow. You can explore the GPT Proto tech blog for more insights into how technology is changing these creative workflows.
Core Capabilities: Mastering the Cut and Dissolve
The backbone of any project is the cut. If your cuts are clunky, your audience will feel it instantly, even if they can't articulate why. You want to maintain immersion. Every time a viewer "sees" the edit, you have lost a little bit of their focus. Mastering smooth cuts is about more than just hitting a hotkey; it is about visual alignment and pacing.
| Technique |
Action Required |
Desired Result |
| Precision Zoom |
Zoom in around 10% on the subject |
Hides jump cuts and maintains flow |
| Eye Alignment |
Align eyes vertically/horizontally across cuts |
Maintains viewer connection and realism |
| Pause Removal |
Use A.I. tools to trim dead air |
Tightens pacing and keeps engagement high |
| Cross Dissolve |
Apply at the midpoint of two clips |
Signals a shift in time or location |
| X/Y Adjustment |
Manually shift clip positioning |
Centers the point of interest for the viewer |
The table above highlights the essential moves you need in your toolkit. For instance, the 10% zoom is a classic trick. When you have to cut out an "um" or a long pause, a straight cut can look like a glitch. By slightly zooming in or out (about 10%), you create the illusion of a second camera angle. This makes the transition feel natural rather than broken.
And then there is the matter of the eyes. This is one of those video editing tips that sounds minor but changes everything. When you transition between two shots of people, make sure the eyes are aligned in the frame. If the viewer’s eyes have to jump from the top left to the bottom right to find the subject's face, you’ve broken the spell. Keep that focus centered.
Dissolves are another beast entirely. A lot of people use them because they look "pretty," but in the language of film, a dissolve means something specific. A straight cut says "we are still here, right now." A dissolve says "time has passed" or "we are somewhere else." If you dissolve between two shots of the same person in the same spot, the audience intuitively understands that minutes or hours have gone by. Use that power intentionally.
The Technical Nuance of Transition Settings
Most editors just drag and drop a transition and move on. But have you ever looked at the default duration? For a cross-fade, the default is often around five frames. This isn't a random number; software companies harvest data from millions of users to find the "sweet spot" that feels smooth to most people. It gives you a couple of frames before and after the action to blend the audio and video.
However, you shouldn't just trust the default. You need to watch the effect as it is applied. Ask yourself: does this improve the flow? Or is it a distraction? If a transition feels too "heavy," try shortening it. If it feels too abrupt, give it more room. Every scene has its own rhythm, and your video editing tips should always lead you back to trusting your own eyes over a software preset.
Best Use Cases for Modern video editing tips
Not every video requires the same level of polish, but these principles apply across the board. Whether you are a YouTuber or a social media manager, the goal is the same: keep the viewer watching. The way you apply these techniques will change depending on the platform and the "vibe" you are going for.
| Platform / Format |
Primary Editing Priority |
Key Technique to Use |
| YouTube Vlogs |
Pacing and personality |
AI-driven pause removal and smooth zooms |
| Social Media Clips |
Instant engagement (first 3 seconds) |
Eye-catching overlays and hard cuts |
| Short Narrative Films |
Emotional continuity |
Precise eye alignment and thematic dissolves |
| Corporate Training |
Clarity of information |
Consistent X/Y positioning for graphics |
As shown in the data above, your approach should be tailored. On YouTube, for example, the "jump cut" is a recognized aesthetic. You don't always need to hide it, but you should still use these video editing tips to make sure those cuts aren't jarring. Removing long pauses is critical here. Many modern programs now include A.I. tools that do this automatically, saving you hours of manual clicking. If you're looking for advanced ways to automate your workflow, you can check out GPT Proto intelligent AI agents which help streamline technical tasks.
For social media, where attention spans are measured in milliseconds, you have to be even more aggressive. You might not use a five-frame dissolve because it’s too slow. You want hard, fast cuts that keep the energy high. But even in a fast-paced edit, the rule about centering the focus remains. If the main action is jumping all over the screen, the viewer will get tired and scroll past.
And let’s talk about corporate or educational content. Here, consistency is your best friend. If you’re cutting between a speaker and a slide, use your X and Y positioning controls to make sure the speaker stays in the same relative area of the frame. It reduces the cognitive load on the viewer, making it easier for them to actually learn what you are teaching.
Applying Universal Principles to Any Project
It doesn’t matter if you are cutting a 15-second TikTok or a 20-minute documentary. The universal principles of editing don’t change. You are always trying to manage the viewer's eye. This is why I always tell people to use markers and guides. If your software has them, use them to line up your transitions perfectly. It is the difference between an edit that feels "fine" and one that feels "pro."
Don't be afraid to experiment with effects, but keep subtlety as your guide. A creative effect can make a video stand out, but only if it serves the story. If you’re just adding a glitch effect because you found a new plugin, you’re probably hurting the final product. Every cut and every effect must have a purpose. If you can't explain why a transition is there, it probably shouldn't be.
Limitations: Why Your Software Choice Doesn't Actually Matter
There is a massive misconception in the creative world that you need a specific brand of software to be "real." This is a trap. I see people spending weeks trying to decide between different editors instead of actually editing. Let's look at the reality of the tool landscape to debunk some of these myths.
| Feature / Aspect |
Common Myth |
The Practical Reality |
| Feature Set |
Pro software has "secret" tools |
95% of features are identical across platforms |
| Output Quality |
Expensive tools render "better" video |
Quality depends on source footage and export settings |
| A.I. Integration |
Only top-tier tools have A.I. help |
A.I. for pause removal is becoming a standard feature |
| Learning Curve |
Pro tools are too hard for beginners |
The basics (cutting, moving) take 10 minutes to learn |
The table clearly shows that the "barrier to entry" is mostly psychological. Most video editing tips you find online will work in any software that has a timeline and a preview window. The software makers want you to think their tool is special, but they are all using the same underlying logic. They even harvest the same types of user data to set their default transition parameters.
The limitation isn't the software; it's the person using it. If you don't understand how to align eyes or how to use a dissolve to show time passing, it won't matter if you're using a $1,000 program or a smartphone app. The output will still look amateurish. Focus on the craft, not the subscription fee. Once you master the fundamentals, switching between different programs becomes a breeze because you’re looking for the same tools in different places.
So, where should you put your focus? Put it into the feedback loop. Watch your edits with fresh eyes. Better yet, watch them without sound. If the visual flow makes sense even without the audio, you know you’ve done a good job with your cuts and transitions. This is a practitioner's secret: the visuals should be able to carry the story on their own.
When NOT to Use Certain Techniques
Just because you know a bunch of video editing tips doesn't mean you should use all of them in every project. Over-editing is a real problem. Sometimes, the best edit is no edit at all. If a shot is beautiful and the performance is great, let it breathe. Don't feel forced to cut just because you haven't made a change in five seconds.
Avoid the "transition trap" where you use a different type of transition for every cut. It’s distracting and looks like a PowerPoint presentation from 1998. Stick to one or two types of transitions per project to maintain a consistent style. Usually, a mix of straight cuts and the occasional cross-dissolve is all you need for a professional look. For those looking to dive deeper into technical model comparisons for their AI needs, you can explore all available AI models to see how they stack up.
The Technical Side of Eye Alignment and Positioning
We’ve touched on eye alignment, but let’s get into the "how." In your effect controls, you will almost always see X and Y positioning. X is horizontal; Y is vertical. When you are transitioning between two people, you can manually adjust these coordinates to make sure the eyes of the person in shot A are in the same physical space as the eyes of the person in shot B.
This is where the 10% zoom comes back into play. If shot B is too wide compared to shot A, you zoom in shot B by about 10% and then use the X and Y controls to line the eyes up. It’s a subtle shift, but it maintains the realism. The viewer's brain doesn't have to work as hard to process the change. This is the hallmark of a "smooth" edit.
You can even use the midpoint of a dissolve to check your work. Stop your playhead right in the middle of the transition where both clips are 50% opaque. If the eyes are perfectly overlaid, you’ve nailed it. If there are "two sets" of eyes in different places, keep tweaking those X and Y numbers until they sit on top of each other. It’s a simple trick that yields massive results.
And remember, these are universal principles. Whether you're working on a cinematic masterpiece or a quick tutorial, the human brain processes visual information the same way. By centering the points of interest, you keep the audience locked into the content rather than the technology behind it.
Perfecting the Cut Shot
Smooth cuts are the backbone of any great edit. You don’t want your scenes to jar the viewer out of their immersion. Here are a few quick ways to perfect those cut shots:
- Zoom for Precision: When you have an unwanted pause, zooming in gives you better control and hides the jump.
- Eliminate Dead Air: Use precise cutting tools to remove long pauses that slow down the pace. Many modern editors now use A.I. to flag these for you.
- Maintain Focus: Always adjust your zoom position so that the main focus—usually the subject's eyes—remains centered in the frame.
By following these steps, you ensure that your editing serves the narrative. Every cut should have a purpose. If a cut doesn't make the story better or the pacing tighter, ask yourself if it's really necessary. Consistency is key here. Each decision should be intentional, moving the viewer from point A to point B without any friction.
Frequently Asked Questions About video editing tips
Does the specific video editing software I use really not matter?
In the long run, no. While some high-end programs have better color grading or more complex motion graphics, the basic ability to cut, trim, and transition is the same across the board. Focus on learning the principles of flow and pacing first. Once you understand those, you can pick up any software in a matter of hours.
How do I know if my transitions are too long?
The best way to tell is the "gut check." Watch your edit back. If you find yourself waiting for the next shot to appear, the transition is too long. Remember that most default transitions are about five frames. If you go much beyond that without a creative reason (like showing a long passage of time), you risk boring your audience.
Why is eye alignment so important in video editing tips?
Eye alignment is about reducing the cognitive load on your viewer. When we watch a video, we naturally look for the subject's eyes to understand their emotions. If the eyes jump around the screen with every cut, our brain has to "re-scan" the frame, which is tiring and distracting. Alignment keeps the viewer's attention right where you want it.
Should I use AI tools for my editing workflow?
Absolutely. AI tools, especially for things like pause removal and transcript-based editing, are massive time-savers. They allow you to get through the "boring" parts of editing (like cleaning up a rough cut) much faster so you can spend more time on the creative aspects like pacing and storytelling. GPT Proto offers access to various models that can help with these automated tasks through a single API.
What is the most common mistake beginners make?
The most common mistake is over-editing—using too many flashy transitions and effects just because they are available. A good edit should be invisible. If the viewer is noticing your fancy transitions instead of your story, you've over-edited. Stick to the basics: clean cuts, proper eye alignment, and purposeful dissolves.
In the end, it's all about practice. You can read all the video editing tips in the world, but you won't get better until you're sitting in front of a timeline making decisions. Try out the 10% zoom trick. Mess around with the X and Y coordinates. Watch how a five-frame transition feels compared to a ten-frame one. Over time, these moves will become second nature, and your videos will look better for it.
Written by: GPT Proto
"Unlock the world's leading AI models with GPT Proto's unified API platform."