Why PixVerse V6 Matters Now in the AI Video Space
The world of AI video is moving fast. If you've spent any time on Civitai or Twitter lately, you’ve noticed the shift. Static images are starting to feel a bit "last year." Everyone is chasing movement, but doing it right is a nightmare.
That is where pixverse v6 enters the conversation. It isn't just another incremental update in a crowded market. It represents a shift toward what I call "directed action." We are finally moving past the era where you hit "generate" and pray for the best.
With pixverse v6, the focus has clearly shifted toward speed and coherence. Most tools in this space are painfully slow. You wait minutes for a five-second clip that might look like a fever dream. But the speed of pixverse v6 changes the creative feedback loop entirely.
I’ve seen practitioners describe the latest updates as "violence in generation speed." It is fast. And in this industry, fast is expensive and rare. When you can iterate ten times in the time it takes another tool to finish one, you win.
The Speed Advantage of PixVerse V6
Let's talk about that speed. In my experience, waiting for an AI to think is the biggest creativity killer. Using pixverse v6 feels different because the latency between idea and visual result is significantly lower than previous versions or competitors.
This efficiency doesn't just save time; it changes how you work. With pixverse v6, you can afford to fail. You can try a wild prompt, see it fail in seconds, and pivot. That kind of rapid prototyping was previously impossible in high-fidelity video generation.
Real World Coherence in PixVerse V6
Coherence is the "final boss" of AI video. Most models struggle to keep a character's face the same from frame one to frame sixty. However, pixverse v6 has introduced features that specifically target this pain point for creators and developers.
The feedback from the community has been loud. People are noticing that pixverse v6 manages "coherent carnage" much better than its predecessors. Whether it is an explosion or a subtle blink, the model keeps the internal logic of the scene together effectively.
"That End Frame Control in pixverse v6 is clearly doing some heavy lifting to keep the motion from falling apart into visual soup."
Core Concepts Explained for PixVerse V6
To really master pixverse v6, you need to understand how it handles spatial and temporal data. It isn't just generating a series of images. It is predicting how pixels should move over time based on physics and your specific creative intent.
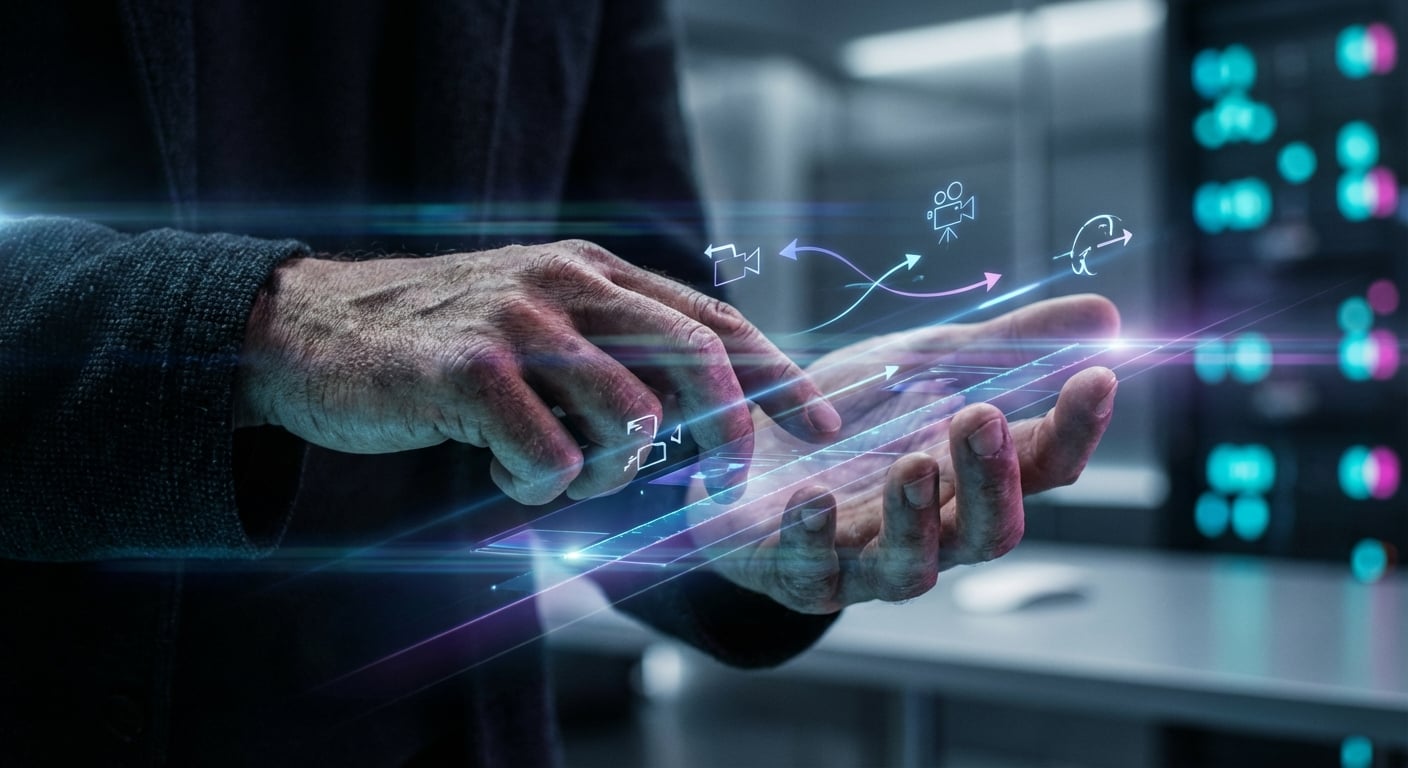
One of the standout features is the Multi-Shot Camera Control. If you've ever tried to direct a scene with an API or a web interface, you know how hard it is to get a "zoom out then pan left" movement accurately.
The way pixverse v6 handles these commands is almost like a cheat code for directors. You aren't just describing a scene; you are commanding a virtual camera crew. This level of granular control is what separates hobbyist tools from professional-grade video software.
End Frame Control Mechanics in PixVerse V6
End Frame Control is probably the most practical addition to pixverse v6. It allows you to define where the video ends, not just where it starts. This creates a logical bridge for the AI to walk across during the generation process.
When you use pixverse v6 with a defined start and end, the "hallucinations" in the middle of the clip drop significantly. The model knows the destination, so the path it takes with the pixels becomes much more stable and visually pleasing.
Multi-Shot Capabilities of PixVerse V6
The multi-shot camera controls available via platforms like Replicate make pixverse v6 a powerful tool for complex storytelling. You can sequence movements that feel cinematic rather than accidental. It gives you a sense of agency that was missing before.
Using the pixverse v6 multi-shot features allows for "directed" action. You can specify a slow tilt or a dramatic zoom. This is essential for anyone trying to build a consistent narrative or a commercial-grade video clip using modern AI technologies.
For developers looking to integrate this, using an API to manage these camera movements is the way to go. You can programmatically define the camera's path within the pixverse v6 environment to create consistent outputs for large-scale video projects.
| Feature |
Impact on pixverse v6 |
Best Use Case |
| End Frame Control |
High Stability |
Storytelling & Looping |
| Multi-Shot Control |
Cinematic Direction |
Action Scenes |
| Fast Inference |
Rapid Iteration |
Social Media Content |
Step-by-Step Walkthrough of PixVerse V6 Prompting
Prompting for pixverse v6 is an art, but there is a specific science to it that most people miss. I’ve seen countless users throw a standard Midjourney prompt into a video model and wonder why it looks like a melting wax museum.
Here is the secret: word order is everything in pixverse v6. The model pays the most attention to the first 15 tokens. If you waste those tokens on "ultra-realistic 8k masterpiece," you are wasting the model's primary focus on fluff.
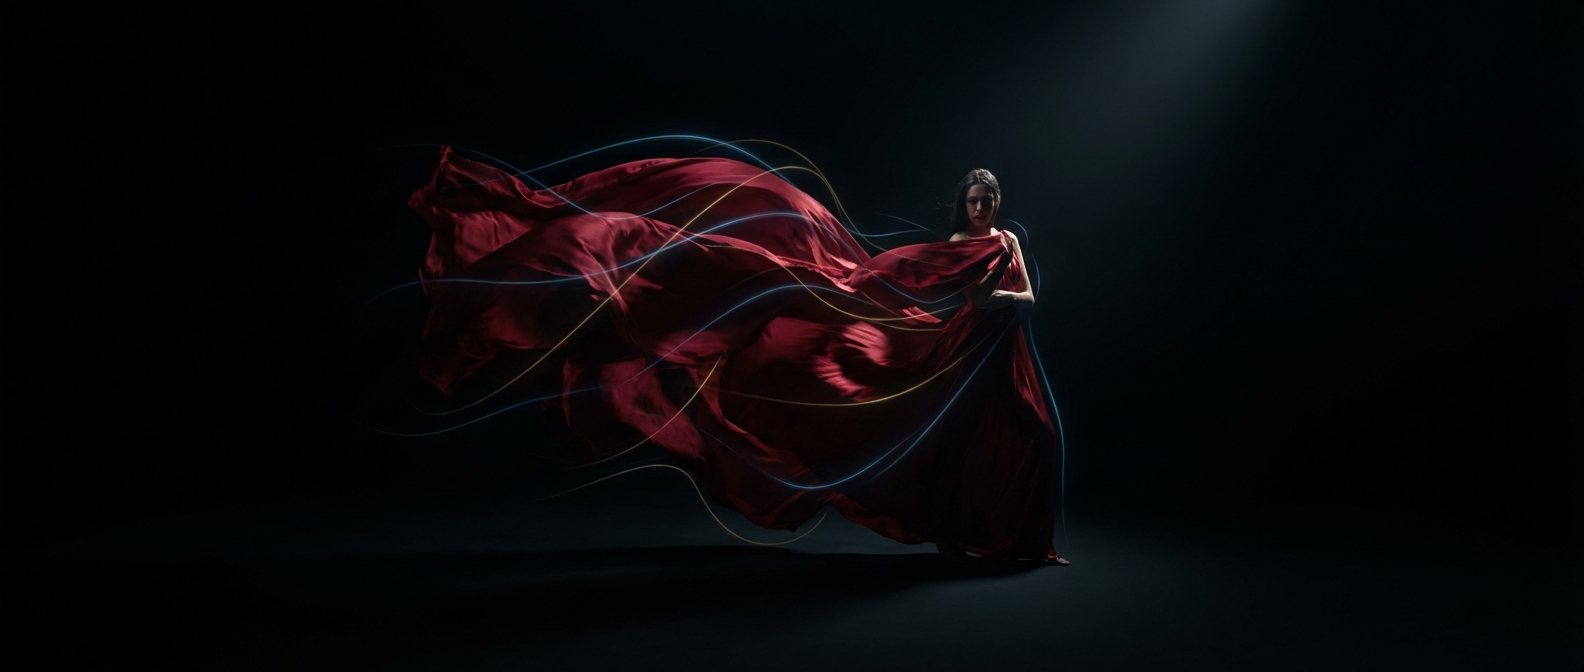
Instead, you need to lead with motion. The pixverse v6 engine needs to know what is moving before it knows what the objects look like. Think of it as "Physics first, textures second." It sounds counter-intuitive, but the results speak for themselves.
The Physics First Formula for PixVerse V6
Start your pixverse v6 prompts with movement keywords like "slow tilt," "subtle blink," or "fast pan." By putting these in tokens 1-15, you tell the model exactly how to shift the pixels before it gets bogged down in the details.
Once the motion is established, you can add the material and textures. For example, "slow tilt, a silk dress flowing in the wind, red fabric, cinematic lighting." In pixverse v6, this order prevents the facial warping and "shimmering" that ruins most AI videos.
Refining Details in PixVerse V6
After the physics and materials are set, that’s when you add your environmental details. The pixverse v6 model is smart enough to layer these over the established motion. This keeps the character's features locked in place while the world moves around them.
If you find that pixverse v6 is producing too much noise, try reducing the complexity of the latter half of the prompt. Focus on one clear action per clip. You can always stitch clips together later, but a single "clean" clip is worth more than a messy complex one.
For those building applications, the pixverse v6 API can be used to automate this prompting structure. You can build a front-end that forces users into this "motion-first" logic, ensuring they get the best possible results from the underlying AI model.
If you're managing multiple models for a project, you might want to track your pixverse v6 API calls alongside other multi-modal tools. This helps you understand which prompts are consuming the most resources and which are delivering the highest quality videos.
Common Mistakes and Pitfalls with PixVerse V6
The biggest mistake I see with pixverse v6 is "prompt overcrowding." People try to describe an entire movie scene in a single generation. AI video isn't there yet. If you ask for too much, the model loses the plot and everything starts to warp.
Another pitfall is ignoring the frame rate and aspect ratio settings. In pixverse v6, these aren't just export settings; they affect how the model calculates motion. A vertical video requires different motion physics than a cinematic 21:9 widescreen shot.
And let's talk about the "uncanny valley." When using pixverse v6, if you don't specify subtle movements, the AI often defaults to "static with weird eyes." You have to explicitly tell the model to be subtle, or it tends to over-animate everything.
The Token Trap in PixVerse V6
Many users treat the pixverse v6 text box like a search engine. It isn't. It is a weighted instruction set. If you put "highly detailed face" at the end of a 50-word prompt, pixverse v6 might barely see it. That is how you get great backgrounds with blurry people.
To avoid this, keep your prompts under 40 words whenever possible. Focus on the core action and the subject. The pixverse v6 model performs significantly better when it has a clear, concise mission rather than a rambling set of suggestions.
Mismanaging Motion Scales in PixVerse V6
PixVerse V6 has a motion slider or parameter in many interfaces. Setting this to 10 (maximum) is usually a mistake. It introduces "ghosting" where parts of the image trail behind. For most realistic scenes, a motion scale of 5 or 6 in pixverse v6 is the sweet spot.
If you are using the pixverse v6 API, you can experiment with these values programmatically. A good tip is to start low. It is much easier to add motion to a stable clip than it is to fix a clip where the subject's head is flying off into space.
- Avoid using "masterpiece" or "4k" in the first 10 tokens of your pixverse v6 prompt.
- Don't set motion intensity to the maximum unless you want an abstract look.
- Never ignore the importance of End Frame Control for consistency.
- Avoid long, rambling descriptions that dilute the AI's focus.
Expert Tips and Best Practices for PixVerse V6
Here’s where we get into the pro-level stuff. To get the absolute best out of pixverse v6, you shouldn't use it in a vacuum. The most successful creators are using what I call the "AI Sandwich" workflow. They start with one tool and finish with another.
For example, generate your base image in Midjourney v6. It has the best lighting and composition right now. Then, feed that image into pixverse v6 as a starting frame. This gives the video model a high-quality "anchor" to work from, rather than relying on text alone.
This "image-to-video" workflow is where pixverse v6 truly shines. It takes the artistic intent of your static image and breathes life into it without destroying the original aesthetic. It is much more reliable than generating from a text prompt from scratch.
The Stacking Method with PixVerse V6
Once you have your clip from pixverse v6, don't stop there. Professional workflows often involve a "pass" through an upscaler or an AI enhancer. Tools like Topaz AI or Gigapixel can take a standard pixverse v6 output and make it look like it was shot on a RED camera.
Also, consider the frame rate. If pixverse v6 gives you a clip that feels a bit "choppy," use an interpolation tool. This adds "in-between" frames to smooth out the motion. This combination of pixverse v6 and post-processing is how the top AI filmmakers are winning awards.
API Efficiency and PixVerse V6
For developers, managing these workflows can be a nightmare. You’re juggling multiple keys and endpoints. That's why unified platforms are becoming the standard. When you read the full API documentation for modern AI aggregators, you see how easy it is to chain these tools together.
Using an API to bridge Midjourney and pixverse v6 allows you to build a fully automated video production pipeline. You can generate the image, pass it to the video model, and then send it to an upscaler—all with one script. This is the future of content at scale.
If you're worried about the costs of scaling such a heavy workflow, you can manage your API billing through GPT Proto. They offer massive discounts on AI usage, sometimes up to 70%, which is a lifesaver when you're running hundreds of pixverse v6 generations for a single project.
What's Next for PixVerse V6 and AI Video
We are entering a phase where the line between "video" and "images" is blurring. On sites like Civitai, more and more model thumbnails are becoming short clips. The community is moving toward pixverse v6 because it facilitates this transition so effectively.
The feedback loop is getting tighter. We are seeing pixverse v6 being used for everything from social media ads to concept art for major films. The speed and director-level controls are no longer just "nice to have"—they are the industry standard.
In the near future, I expect pixverse v6 to integrate even more deeply with 3D environments. Imagine a world where the AI doesn't just predict pixels, but understands the 3D space of the scene. That’s the trajectory we are on, and this model is a significant step in that direction.
The Civitai Shift and PixVerse V6
Check out the latest trends on Civitai. You’ll notice that static images are no longer the only way people showcase their LoRAs or checkpoints. They are using pixverse v6 to create "living" versions of their models. It provides a much better sense of how a model handles lighting and texture.
While some users complain that video thumbnails are taking over, it’s an inevitable shift. The demand for motion is growing, and pixverse v6 is the tool meeting that demand. It’s allowing creators to stand out in a sea of static AI art.
Integrating PixVerse V6 Into Your Dev Stack
If you are a developer, now is the time to start experimenting with pixverse v6. Whether you are building a social media automation tool or a new creative suite, the video capabilities here are too good to ignore. The API accessibility on Replicate makes it easier than ever.
You can explore all available AI models on GPT Proto to see how pixverse v6 stacks up against other options like Minimax or Runway. Having all these multi-modal tools in one place, with a unified API, makes the development process infinitely smoother.
The transition from image-based AI to video-based AI is the biggest story in tech right now. By mastering pixverse v6, you are positioning yourself at the forefront of that movement. Don't wait for the tools to become perfect; learn to drive them while they are still evolving.
Written by: GPT Proto
"Unlock the world's leading AI models with GPT Proto's unified API platform."

