Kling 3.0 Motion Controlは、静止したキャラクター画像に参照動画の動きを付けます。キャラクターの画像と、動いている人物の動画という2つの入力を渡すと、キャラクター自身の顔、衣装、見た目を保ったまま、その振り付けを正確に再現する新しいクリップが返されます。
これはテキストから動きを生成するものではなく、モーション転送です。プロンプトで動作を説明してモデルの解釈に期待するのではなく、フレーム単位で動作を見せます。そのため、繰り返し可能なキャラクターアニメーション、ダンス、ジェスチャー制作において、はるかに信頼性の高い結果が得られます。
このガイドでは、単発のクリップ制作に使うKlingのWebアプリと、Motion Controlをパイプラインに組み込むGPTProto APIの両方を説明します。入力と制限、`pro`と`std`の各ティア、プロンプトの使い方、完全に実行可能なコード、料金、クレジットを使う前に知っておきたい失敗例を取り上げます。
Michael Johnson2026-06-30
Kling 3.0 Motion Controlの使い方:開発者向けガイド(Web + API)
Kling 3.0 Motion Controlの開発者向けガイド。proとstdの比較、入力制限、プロンプトのヒント、GPTProto経由で実行できるAPIコード(Python + cURL)を解説します。
目次
What Is Kling 3.0 Motion Control
Motion Control takes one character image and one driving (reference) video, then generates a video in which the character matches the reference's movements, facial expressions, and — optionally — camera orientation. The visual identity comes from your image; the motion comes from your video.
| Spec | Detail |
|---|---|
| Task type | Image-to-video only (a character image is required; no text-to-video Motion Control) |
| Inputs | 1 character image + 1 driving video (+ optional prompt / negative prompt) |
| Reference video length | 3–30 seconds; output length aligns to the reference |
| Min extractable motion | 3 seconds of continuous action |
| Image resolution | Short edge ≥ 340px, long edge ≤ 3850px |
| Multi-character video | The character occupying the largest frame area drives the motion |
| Tiers | std (720p) and pro (1080p) |
| Orientation modes | image (max 10s output) or video (max 30s output) |
What changed from 2.6 to 3.0
If you used Motion Control on Kling 2.6, the 3.0 upgrade is about consistency and physics rather than a new interface:
- Better identity preservation — less face drift across the clip.
- Grounded physics — feet stay anchored instead of "sliding on ice."
- Element consistency — multi-angle face and outfit detail hold up better through turns.
- Longer outputs — up to 30 seconds when orientation follows the video.
- Faster inference — materially quicker turnaround per generation.
One behavior to keep in mind: 3.0 Motion Control transfers movement only. It does not blend scene elements from the driving video into your character — the output sticks to the character image you supplied.
Kling 3.0 pro Motion Control vs Kling 3.0 std Motion Control
The two tiers run the same model with different output quality. Use std while you iterate on the reference video and prompt, then switch to pro for the final render.
| Kling 3.0 std Motion Control | Kling 3.0 pro Motion Control | |
|---|---|---|
| Output resolution | 720p | 1080p |
| Best for | Iteration, drafts, high-volume runs | Final delivery, client work |
| Speed | Faster | Slightly slower |
| Price (Per Time) | $0.3024 (20% off, market $0.378) | $0.4032 (20% off, market $0.504) |
| API model slug | kling-v3.0-std |
kling-v3.0-pro |
"Per Time" means the final cost scales with the generation you run; the model page's playground shows the live total before you submit.
Input Requirements (Read This First — It Saves Credits)
Most failed generations come from bad inputs, not the model. The single biggest predictor of a clean result is the quality of frame 1 and the driving video.
Character image
- One person, clean half-body or full-body framing.
- Face clearly visible and reasonably large in the frame — small faces force the model to invent detail, and likeness drifts.
- Match the framing roughly to your reference video (don't pair a head-and-shoulders portrait with a full-body dance video).
Driving (reference) video - 3–30 seconds, single continuous shot, no cuts or hard camera moves — cuts can truncate the output.
- One subject, full body and head visible and unobstructed.
- Steady, moderate motion. Very fast or complex action may make the output shorter than the input, because only valid continuous segments are extracted.
- Keep hands visible if you need good hands in the result.
If less than 3 seconds of usable continuous motion can be extracted, the generation can fail and — per Kling's terms — those credits are not refunded. Validate your reference clip before submitting at scale.
How to Use Kling 3.0 Motion Control in the Web App
For one-off clips, the Kling web UI is the fastest route:
- Open Kling, select the 3.0 model, then click Motion Control.
- Upload your driving video into the "character actions to mimic" box.
- Upload your character image into the box on the right.
- (Optional) Add a prompt describing the scene — lighting, environment, camera. Do not describe the action; that comes from the video.
- Set character orientation: follow the video (up to 30s) or the image (up to 10s).
- Choose std (720p) or pro (1080p) and click Generate.
That's enough for manual work. The rest of this guide is for automating it.
How to Use the Kling 3.0 Motion Control API
This is the part most teams come for: a guide to the Kling 3.0 Motion Control API you can run end to end. GPT Proto exposes Kling through a unified, OpenAI-compatible account with a single key, and the video tasks follow a create-then-poll pattern.
Step 1 — Get an API key
Sign up at gptproto.com/dashboard and generate a key. One key works across every model on the platform. Export it so the examples pick it up:
export GPTPROTO_API_KEY="your_key_here"
Step 2 — Create a Motion Control task
You submit the character image, the driving video, the tier, and an optional prompt. The API returns a task id you'll poll for the result.
Note: GPT Proto authenticates Kling with a
Bearertoken in theAuthorizationheader. The Motion Control task takesimage(character),video(driving clip),prompt,negative_prompt,character_orientation, andkeep_original_sound.
cURL
curl -X POST "https://gptproto.com/api/v3/kling/kling-v3.0-pro/motion-control" \
  -H "Authorization: Bearer $GPTPROTO_API_KEY" \
  -H "Content-Type: application/json" \
  -d '{
    "image": "https://example.com/character.jpg",
    "video": "https://example.com/driving-motion.mp4",
    "prompt": "studio lighting, plain grey background, static camera",
    "negative_prompt": "warped background, extra fingers, motion blur",
    "character_orientation": "video",
    "keep_original_sound": false
  }'
Swap kling-v3.0-pro for kling-v3.0-std to run the 720p tier.
Step 3 — Poll for the result
Video generation is asynchronous. Take the id from the create response and poll the predictions endpoint until status is finished, then read the output URL.
Python (end to end)
import os
import time
import requests

BASE = "https://gptproto.com/api/v3"
API_KEY = os.environ["GPTPROTO_API_KEY"]
HEADERS = {"Authorization": f"Bearer {API_KEY}", "Content-Type": "application/json"}

def create_motion_control(image_url, video_url, prompt="", negative_prompt="",
                          tier="pro", orientation="video"):
    url = f"{BASE}/kling/kling-v3.0-{tier}/motion-control"
    payload = {
        "image": image_url,                       # character identity
        "video": video_url,                       # driving motion (3-30s, single shot)
        "prompt": prompt,                         # describe the SCENE, not the action
        "negative_prompt": negative_prompt,       # artifacts to suppress
        "character_orientation": orientation,     # "video" (<=30s) or "image" (<=10s)
        "keep_original_sound": False,
    }
    r = requests.post(url, json=payload, headers=HEADERS, timeout=60)
    r.raise_for_status()
    return r.json()["data"]["id"]

def wait_for_result(task_id, interval=5, timeout=600):
    deadline = time.time() + timeout
    while time.time() < deadline:
        r = requests.get(f"{BASE}/predictions/{task_id}/result", headers=HEADERS, timeout=60)
        r.raise_for_status()
        data = r.json()["data"]
        status = data.get("status")
        if status in ("succeeded", "completed"):
            return data["outputs"]          # list of output video URLs
        if status in ("failed", "error"):
            raise RuntimeError(data.get("error") or "generation failed")
        time.sleep(interval)
    raise TimeoutError(f"task {task_id} did not finish within {timeout}s")

if __name__ == "__main__":
    task_id = create_motion_control(
        image_url="https://example.com/character.jpg",
        video_url="https://example.com/driving-motion.mp4",
        prompt="studio lighting, plain grey background, static camera",
        tier="pro",
        orientation="video",
    )
    print("task:", task_id)
    outputs = wait_for_result(task_id)
    print("video:", outputs)
Confirm the exact
statusstrings against the live response — the image-to-video docs exposedata.status,data.outputs, anddata.error, which is what the poller reads here.
Writing a Good Kling 3.0 Motion Control Prompt
The prompt in Motion Control is not where the action lives — the driving video handles that. A Kling 3.0 Motion Control prompt should describe everything except movement: the setting, lighting, wardrobe details, mood, and camera behavior.
Do describe:
- Environment and background ("neon-lit alley at night", "plain white studio cyclorama")
- Lighting ("soft key light from the left", "hard rim light")
- Camera intent ("static camera", "locked-off tripod shot")
- Style notes ("cinematic, shallow depth of field")
Don't describe: - The action itself ("waving", "dancing", "turning around") — that comes from the reference video and a conflicting prompt can fight it.
A reliable starting template:
[scene/background], [lighting], [camera behavior], [style]
Example: plain grey studio background, soft even lighting, static camera, cinematic
Use the negative prompt to suppress recurring artifacts: warped background, extra fingers, motion blur, duplicate limbs.
Orientation and Duration
character_orientation does double duty — it controls how the character is posed and caps the output length:
| Setting | Behavior | Max output |
|---|---|---|
video |
Character follows the reference video's orientation and camera | 30s |
image |
Character keeps the image's orientation | 10s |
Rule of thumb: if identity drifts, try image; if motion feels stiff or under-transferred, try video. The output length tracks the reference video, so a 12-second result needs a ~12-second driving clip and the video orientation.
Common Problems and Fixes
| Symptom | Likely cause | Fix |
|---|---|---|
| Warped / wobbling background | Camera moving too aggressively | Add static background / static camera to the prompt; add warped background to negative prompt |
| Face likeness drifts | Face too small in the source image | Use an image where the face fills more of the frame; try character_orientation: image |
| Output shorter than the reference | Fast/complex motion; only continuous segments extracted | Slow the action; use a single clean continuous take |
| Bad / mangled hands | Hands hidden in the reference video | Use a reference where hands stay visible |
| Generation truncated | Cuts or camera moves in the reference | Use one continuous shot, no edits |
Pricing
GPT Proto bills per task, pay-as-you-go — no subscription floor. Pricing is "Per Time," so the final cost scales with the generation you run; the model page's playground shows the live total before you submit.
| Model | Tier | Motion Control Per Time rate |
|---|---|---|
kling-v3.0-pro |
pro (1080p) | $0.4032 (20% off, market $0.504) |
kling-v3.0-std |
std (720p) | $0.3024 (20% off, market $0.378) |
Live rates are on each model page.
Next Steps
- Try the model: Kling 3.0 Pro on GPT Proto
- Standard tier: Kling 3.0 Std on GPT Proto
- Compare costs across video models: Browse GPT Proto models
- Get a key and ship: GPT Proto Dashboard


よくある質問
キャラクター画像なしでMotion Controlを使えますか?
いいえ。Motion Controlは画像から動画への変換専用で、キャラクター画像が必須です。テキストから動画へのMotion Controlモードはありません。
出力はどのくらいの長さにできますか?
character_orientation: videoの場合は最大30秒、imageの場合は最大10秒です。出力の長さは参照動画に合わせられます。
stdとproの違いは何ですか?
stdは720pで、反復作業向けにより安価かつ高速です。proは最終納品向けの1080pです。モデルとAPIの形式は同じで、異なるのはスラッグと品質だけです。
参照動画に2人の人物がいる場合はどうなりますか?
フレーム内で最も大きな面積を占めるキャラクターの動きが適用されます。予測しやすい結果を得るには、被写体が1人だけの参照動画を使ってください。
参照動画の音声は保持されますか?
有効にした場合のみ音声が保持されます(keep_original_sound: true)。このページの例ではデフォルトで無効になっています。
関連記事
他のブログを見る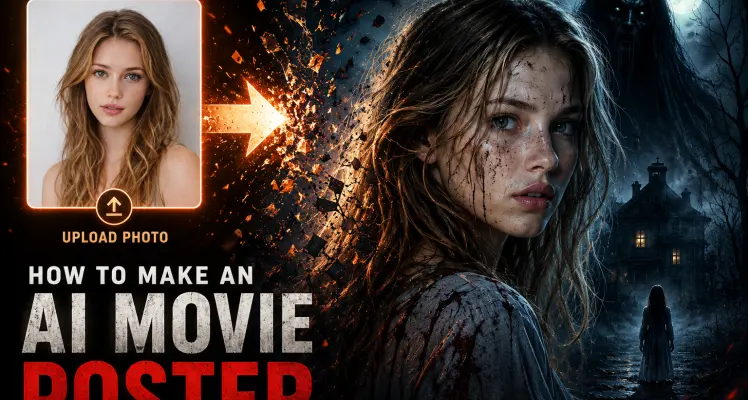
タイトルを正確に描画するAI映画ポスターの作り方(2026年版)
AI映画ポスターで難しいのは、画像そのものではありません。どんな画像モデルでも、20秒ほどで雰囲気のあるヒーローショットを作ってくれます。難しいのは、それをポスターとして成立させるすべての要素です。意味不明に溶けていないタイトル、実際に読めるタグライン、下部のクレジットブロック、そして正方形ではなくワンシートの形をしたフレーム。私は週末を使って5つのジャンルのポスターを生成しましたが、ほぼすべての失敗は、3つの原因のいずれかに行き着きました。—比率が間違っている、テキスト用のスペースが残っていない、またはアートワークと同じ工程でモデルに文章のようなタイポグラフィを描かせようとしていることです。 このガイドでは、その3つを解決します。ジャンル別のコピーペースト用プロンプト、自分の写真をポスターに変えるためのプロンプト集、タイトルをくっきりさせる2段階のテクニック、そして、5枚ではなく50枚作りたい場合に使える実行可能なAPI呼び出しを紹介します。使用するモデルは2つです。正確で多言語のテキストに強い gpt-image-2 と、スタイルと4K出力に強い Gemini 3 Pro Image (多くの人がNano Banana Proと呼んでいるモデル)です。どちらもGPTProto経由で動作するため、切り替えは1行変更するだけです。
Schuyler Stacy | 2026-06-16
Seedance 2.5はもうリリースされた?リリース日と現時点で実際に分かっていること(2026年)
今週、Seedance 2.5が登場するのを待ちながら、ByteDanceのSeedページを自分でも呆れるほど何度も更新してきました。今のところ、何もありません。モデルページも、仕様書も、日付もありません。この空白が、まさにこの記事を書いた理由です。現在、Seedance 2.5について自信満々に書かれた記事が数多く出回っていますが、そのほとんどは推測を事実のように扱っています。ここではその2つを明確に分け、今日実際に使えるものを紹介します。
Tiffany Layne | 2026-06-23
APIでAI生成インフルエンサーを作る方法(実際の運用コストも解説)
ほとんどの人が初めて作るAIインフルエンサーは、2枚目の画像で失敗します。最初のレンダリングは素晴らしく見えます — 信じられそうな顔、まずまずの照明。しかし2つ目の投稿を生成すると、頬骨の位置が変わり、鼻が広くなり、目の色も違っている。別人です。3つ目の投稿では、さらに別の人物になります。手元に残るのはインフルエンサーではなく、髪の色だけが共通する見知らぬ人たちのフォルダーです。 検索上位に出てくるノーコードツールは、この問題をボタンの裏に隠しています。写真をアップロードし、生成をクリックし、結果を得る。それで問題ないのは、規模を拡大したり、見た目を変えたり、スケジュールに沿って100件の投稿を実行したりする必要がない場合だけです — その時点で、1つのモデル、1つのスタイル、そして画像を5枚生成しても500枚生成しても、通常は月額19~99ドルのサブスクリプションに縛られます。 このガイドでは、別の道を進みます。それがAPIです。SaaSのボタンをクリックするよりも設定は複雑で、数行のコードを書き、APIキーを管理する必要があります。その代わり、各ショットをどのモデルでレンダリングするかを自分で管理でき、月額ではなく画像単位で支払え、パイプライン全体を自動化できます。読み終える頃には、固定された1つのアイデンティティ、一貫性のある投稿のバッチ、任意で追加できる縦型リール、そして — 他のガイドが省略しがちな部分 — 1投稿あたりの実際のコストがわかります。 なぜそこまで手間をかけるのか、背景を説明しましょう。バルセロナのエージェンシーThe Cluelessが制作したAIモデル、Aitana Lópezは、月に最大€10,000、平均で約€3,000を稼いでいます。 クリエイターによると 、 Euronewsが報じた 内容です。この数字を覚えておいてください。制作に実際いくらかかるのかがわかったら、ここに戻ってきます。この2つの数字の差こそが、ビジネスのすべてだからです。
Schuyler Stacy | 2026-06-17